Walk Around Page
Use the Walk Around page to indicate any damage to the vehicle to limit liability claims as well as to look for opportunities to sell additional services.
Note: The entire walkaround should be completed looking for both liability limitation (mark an existing dent and if the customer questions that the dent was not there before, the Advisor can show the walkaround) as well as elapse opportunities (the wiper blades are worn, state inspection needs renewing, etc.)
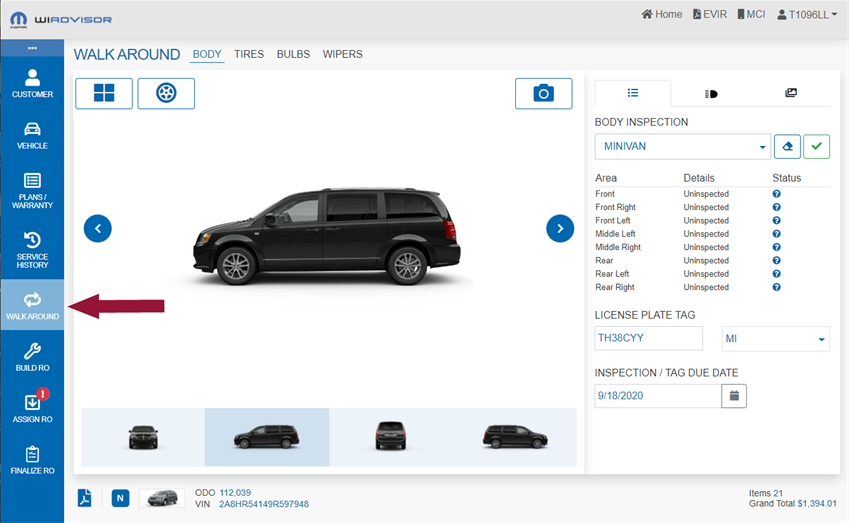
The information is divided into four tabs: Body, Tires, Bulbs and Wipers. Use each tab to capture the status of the vehicle.
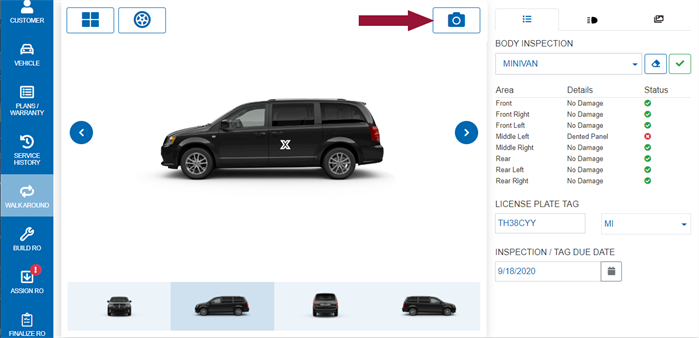
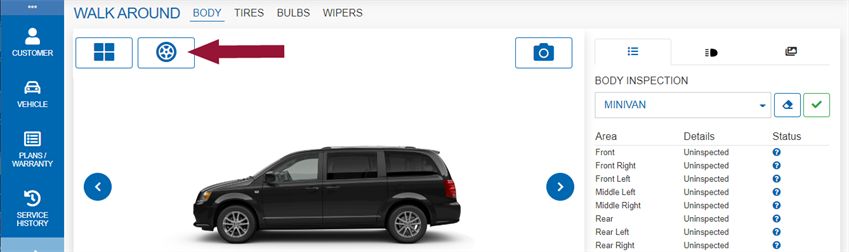
Start on the Body tab to specify any vehicle body damage.
On the Body page:
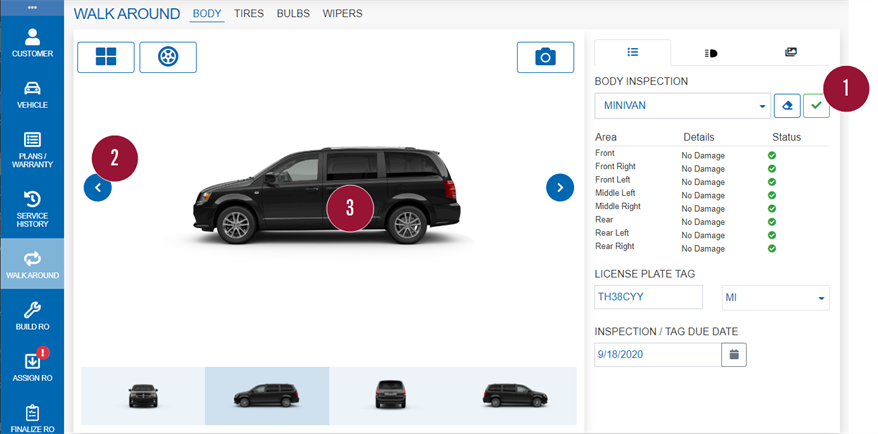
- To start by marking all areas of the vehicle as No Damage, click

- At any time during the walk around, click
 to reset all areas to "Uninspected" .
- At any time during the walk around, click
- Use the arrows

 , or click on an image profile at the bottom of the page, to select a vehicle view to note concerns: front, left side, rear or right side.
 - In each image, click on a part of the vehicle to note damages in that area (front, front right, front left etc.) using the fields that appear at the bottom of the image:

- Specify (click on) the type of damage.
- Enter any comments then click "Add" to save the information and hide the fields.
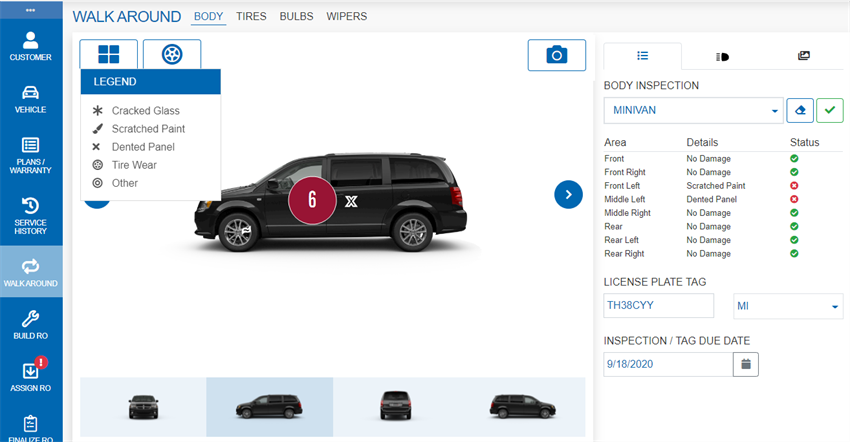
- A damage mark appears on the image according to the selection and the area status is updated. If needed, click the legend at the top of the page
 to understand the marks.
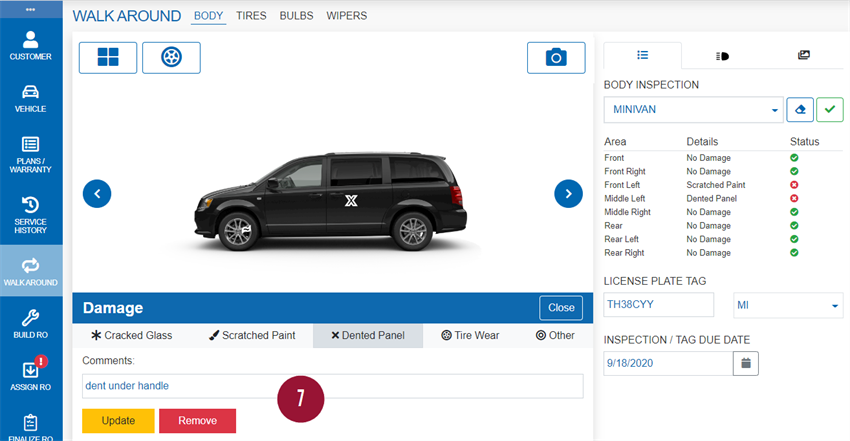
- To make a change, click on the area again to open the damage fields. Click "Remove" to delete the damage completely, otherwise make an update then click "Update".
When working in any of the four Walk Around views, locate the camera icon  and click it to open wiCAPTURE and add photos. Use it to indicate where pre-existing problems are on the vehicle.
wiCAPTURE uses any camera that is integrated with the user's tablet. No additional app is required. Only still images can be captured: no videos or audio.
Note: The first time you launch wiCAPTURE, you may see a message from your browser asking you to allow the application to use your device's camera. Check "Always allow" so the message does not appear each time.
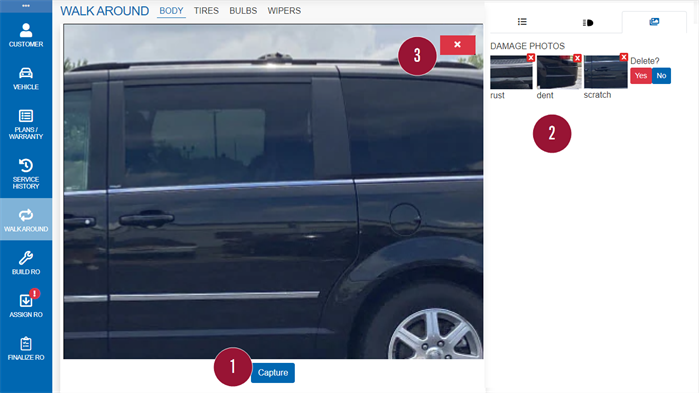
In the wiCAPTURE window:
- Position your camera shot then click "Capture" . Once the picture is taken you will be able to add a caption.
- For each picture taken, a thumbnail appears in the Damage Photos list on the right (click
 ) along with any caption. Click an image to expand the photo. Review and delete as needed.
 - Click "x" when all pictures have been taken.
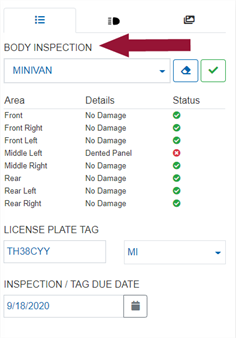
On the right, the following information appears under the Body inspection tab :
:
- The body type. Update if needed. The vehicle image changes accordingly.
- The current damage status of each area.
- License Plate and State. Enter or update if needed.
- Inspection/Tag Due Date. Enter or update if needed.
The other tabs (Light Actuator  and Damage Photos
  ) are described elsewhere in this section.
Select the Light Actuators tab to use the light actuator to identify burnt out exterior bulbs. Refer to Models compatible with Light Actuator for a list of models that can be used with this tool.
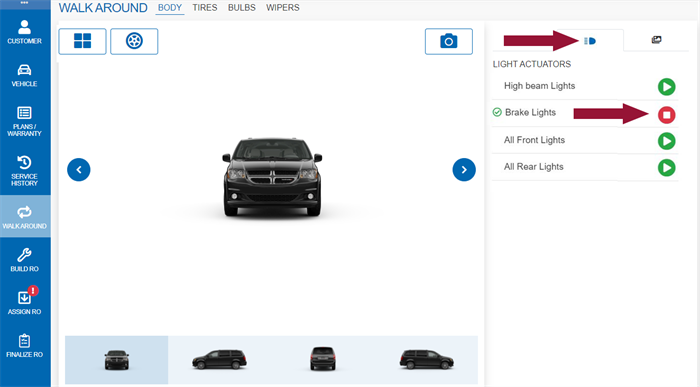
Click  beside each set of exterior lights to perform the tests:
| High Beam Lights |
(Make sure all front lights are stopped first) |
| Brake Lights |
(Make sure all rear lights are stopped first) |
| All Front Lights |
All front lights and side marker bulbs are turned on. The button changes to "Stop All Front Lights" (red). Click it to turn the lights off when done. |
| All Rear Lights |
All rear lights including the license plate bulbs are turned on. The button changes to "Stop All Rear Lights" (red). Click it to turn the lights off when done. |
Note: The vehicle must be podded throughout the test.
Select the Tires tab at the top of the page to enter tire information.
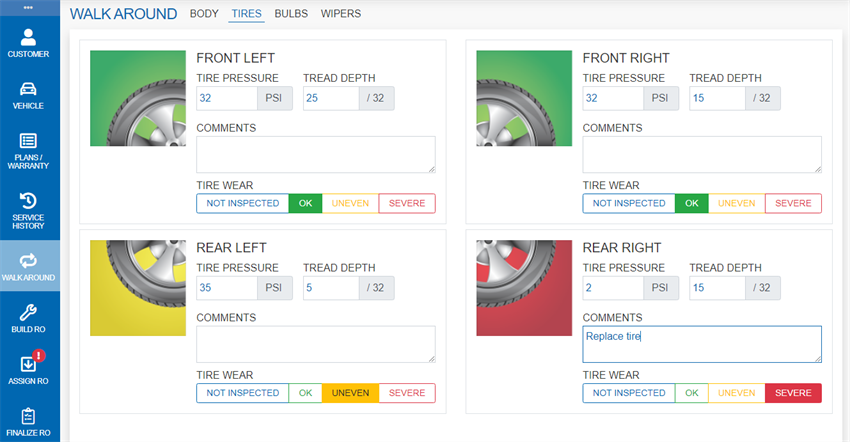
The tire pressure will have been filled in already if a microPod was used and the vehicle has TPM (Tire Pressure Monitor) capability. If not, enter the Tire Pressure and Tread Depth values manually.
Depending on Tread Depth or Tire Wear being marked as ‘Uneven’ or ‘Severe’, the tire box will turn:
- Yellow to indicate the tire needs to be replaced soon (recommend the next visit), or
- Red to indicate the tire needs to be replaced now.
Note: In the example, the right rear tire needs to be replaced immediately.
To select new tire(s) for the vehicle, click  at the top of the Body tab.
If tire integration is enabled at the dealer, the Mopar Tireworks Offers window appears showing tires for the VIN. Refer to Choosing New Tires for more information.
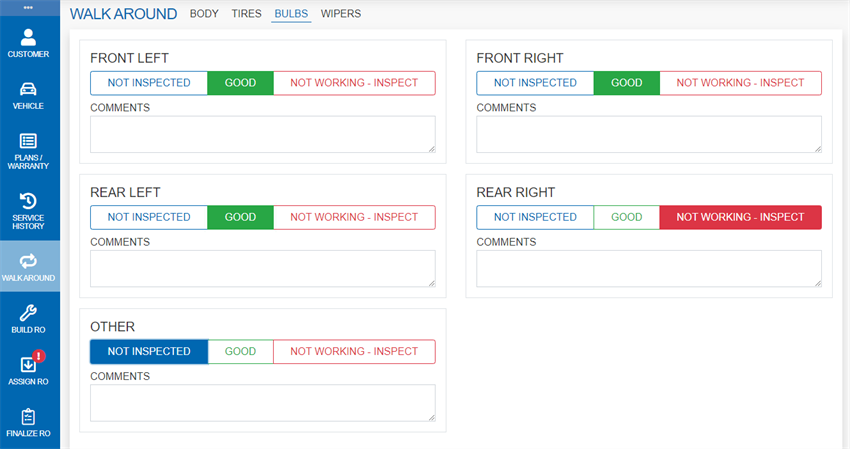
Select the Bulbs tab to enter results from a bulb operation check:
If available for the model, use the light actuator feature to test the exterior lights.
Select the Wipers tab to note wiper blade inspection results.
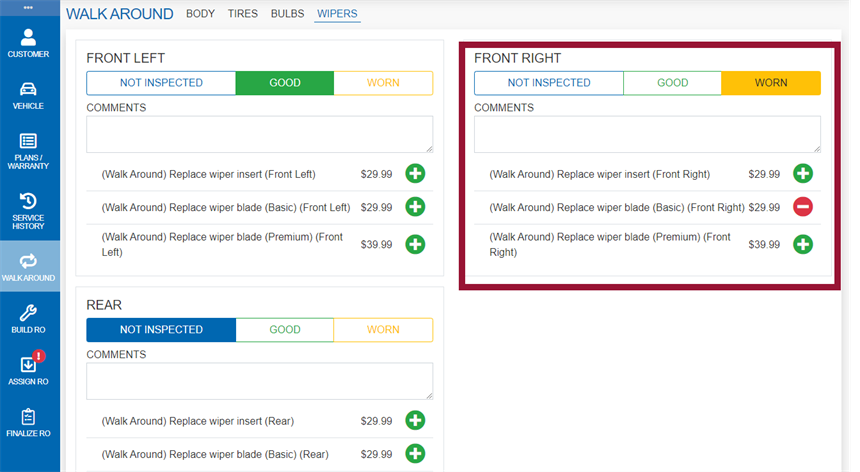
If blades need to be replaced, select from different types of wiper blades based on customer preference and which style(s) your shop keeps in stock. Click  to add them as a service line to the RO.
Note: Before adding wiper blades to the RO, make sure the OP Code had been setup by Dealer Administration.