Importing task lists
Lists of
Note: Refer to Import File Layout for the import file requirements and the file layout.

To import a task list, start on the Campaigns page:
- Select 'Import Call List' from the Campaign Type list. All existing campaigns that are setup as Import Call List type are shown.
- If a new campaign needs to be setup, click "New Campaign", or copy an existing campaign, and enter the campaign information.
- Campaign name, description and call script information are mandatory. Task assignment is optional. Other campaign information is not required.
- You must first create the new campaign (i.e. click "Create" on the last page) to add it to the campaign list before you can complete the configuration.
- Click on the campaign name. The campaign information appears on the right. Do not use the Default campaign.
- Select the Import tab to display the Import page:
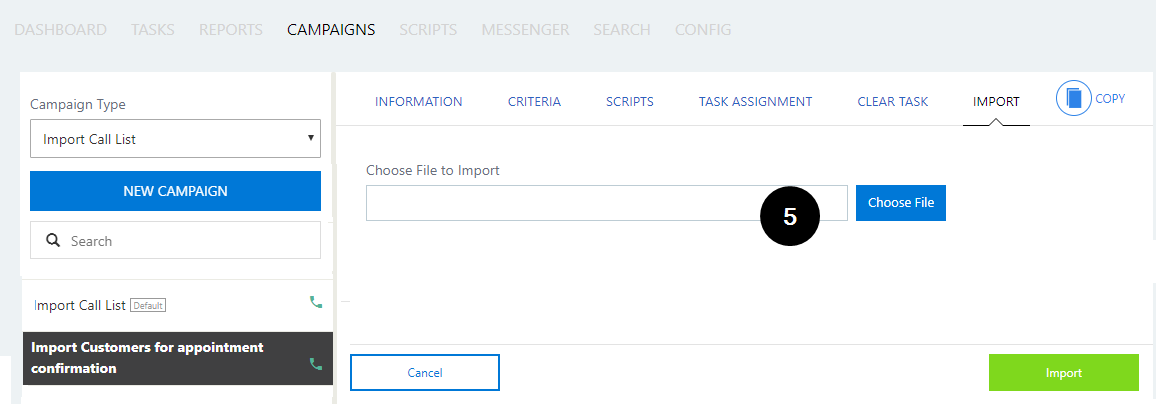
- Click "Choose File" to select the CSV file to import. The following window appears:
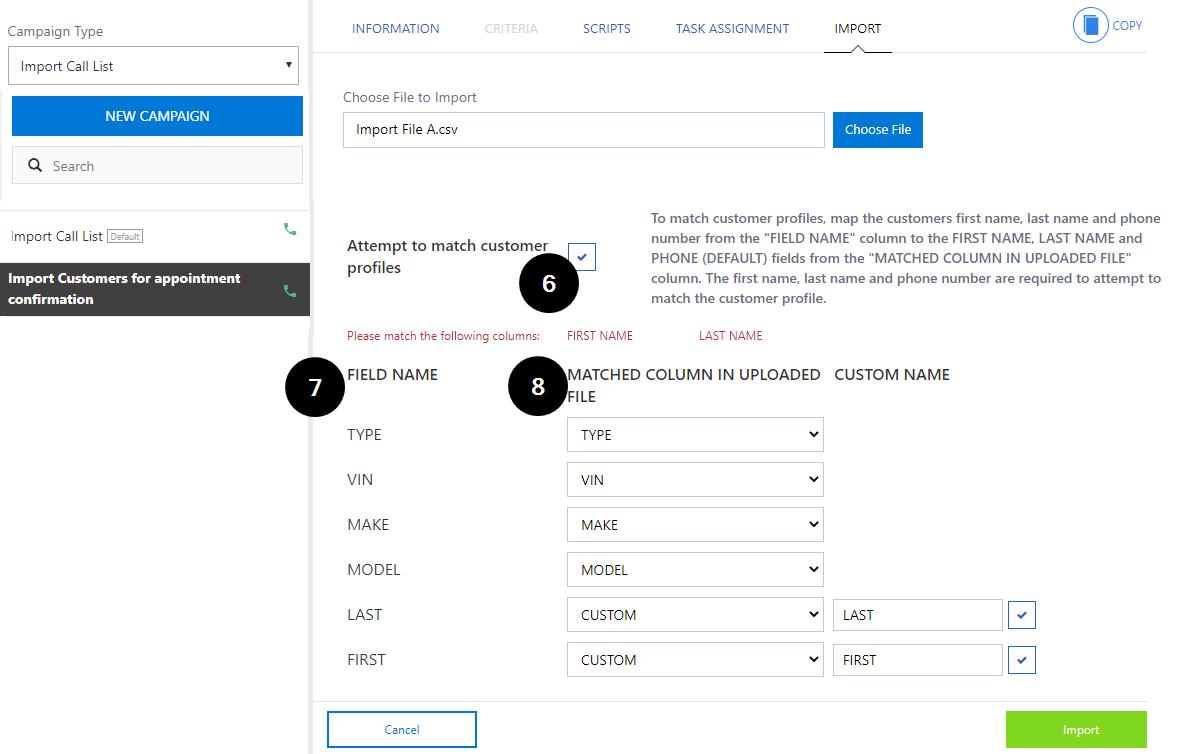
- Select the check box to match records against the customer database when the specified call list is imported.
- If
- If this option is not selected, records will be uploaded to the campaign with the available information but no customer matching will occur.
- If
- Field Name lists fields being imported from the CSV file (based on the header record).
- Matched column in Uploaded file displays the application's suggested match to a
- If no match is found, the field defaults to 'Custom'.
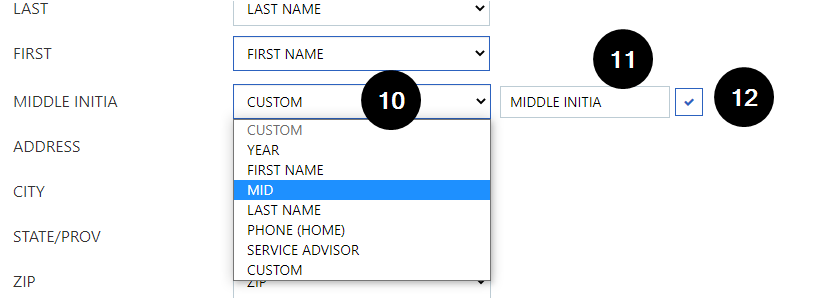
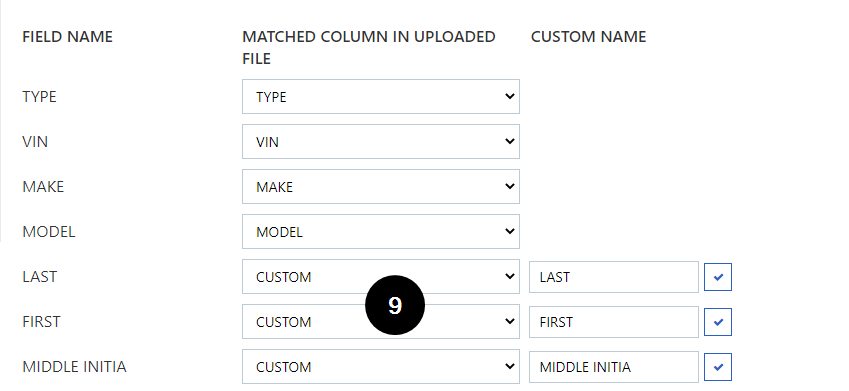
To establish the field assignments when no match is found:
- Select an alternate name from the drop-down list of unassigned campaign fields, or:
- Enter an appropriate name in the Custom Column Name field (Note that the Field Name column reflects any new name entered), or:
- Click
 to deselect the custom field and use the field name from the CSV file.
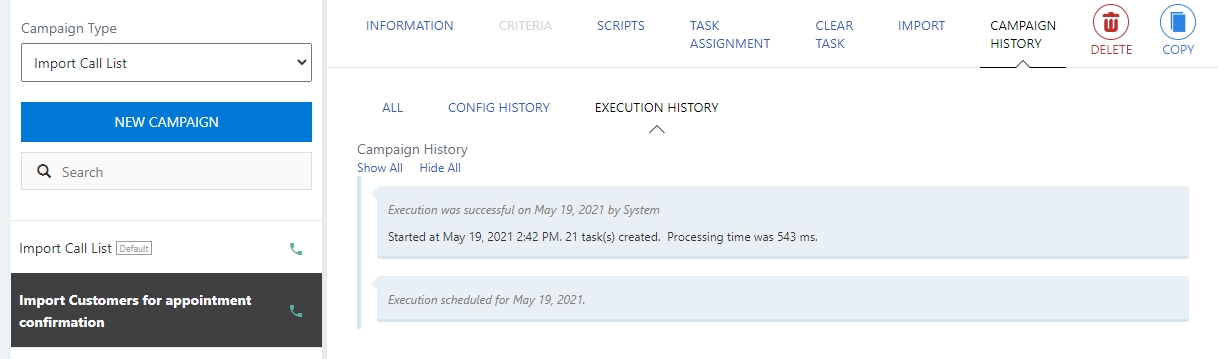
Click  to initiate the upload, once you have assigned all the fields. A message appears indicating that the import may take a few minutes. To check the status of the import, go to the campaign's Execution History log under the Campaign History tab:
When working with an imported tasks on the Task Details page:
-
The imported tasks are added to the end of the campaign task list, if this is an existing campaign.
-
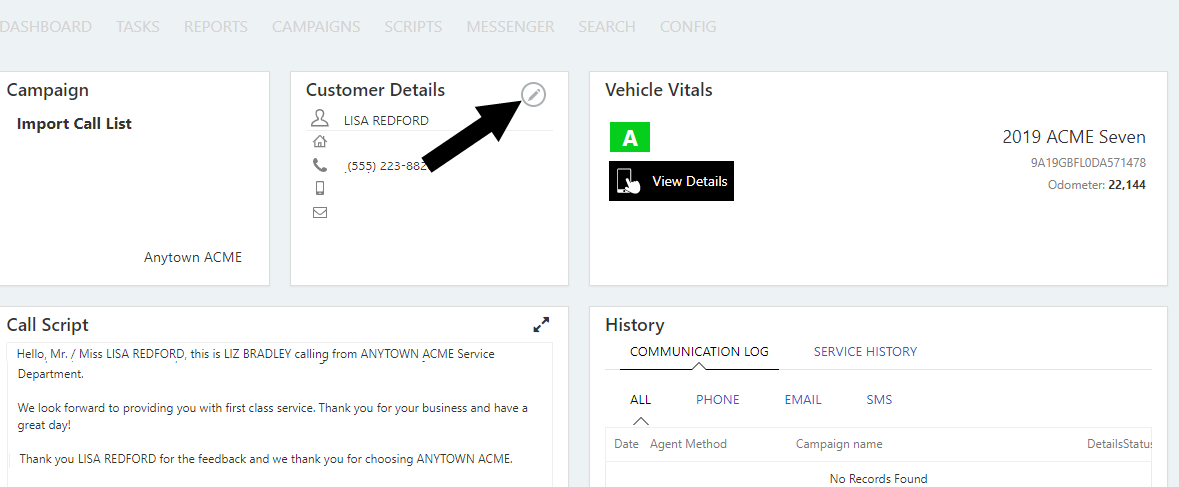
If customer matching was selected and a record is successfully matched, the customer details appear.
-
If customer matching was selected and a record does not match an existing customer record, the task is created, but only available information from the file appears. The Customer Details icon
 will be greyed-out indicating that you cannot access the customer
-
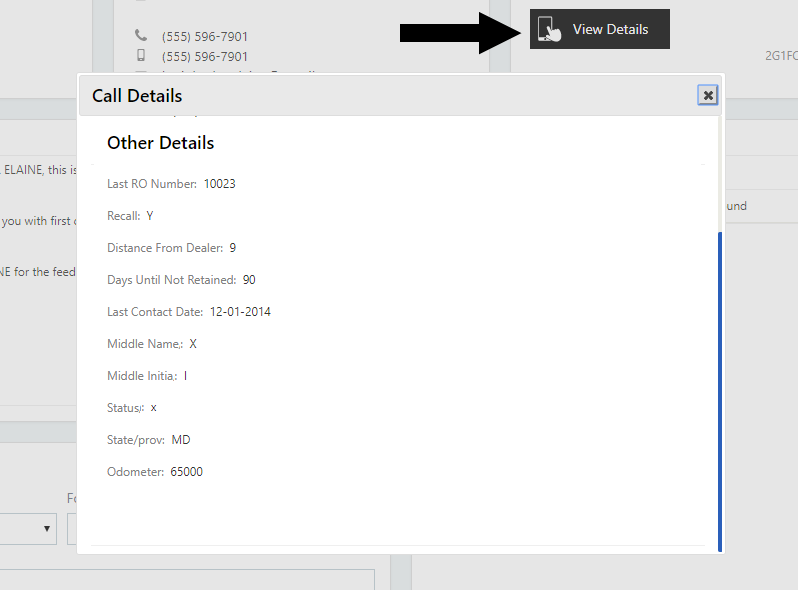
The value of any custom fields can be seen by clicking the "View Details" button: